


Snow Moon Bookmark Kits
A guide to crafting a uniquely you bookmark for your favorite book.

This year, the Full Snow Moon aligns with Valentine’s Day and Galentine’s Day. What better way to celebrate than by crafting bookmarks with friends? Add in playing a game of literary icebreakers, enjoying a delicious treat, and cozying up with a book inspired film and you have yourself the perfect craft date.
The Philosophy of Crafting
The key to any craft is to embrace the Japanese philosophy Wabi-sabi, that encourages the acceptance of transience and imperfection. Pair this with a willingness to devote the necessary time to fully realize your vision, and you’re golden.
Read instructions, watch a tutorial, let someone teach you. Then once you know the rules, you can bend or even break them. Let yourself explore, make mistakes, and discover new approaches.
Plan ahead. Yes, an impromptu crafting session can be great, but magic happens when you allow yourself to create well prepared without scheduling conflicts. Give yourself the proper time, space, and tools to create something you will love for years.
Creating something out of materials you already have around the house is an incredible practice in conscious living. Choose to diverge from a culture that demands we overconsume, and in turn create an excess of waste.
Crafting is a positive outlet for creative expression, skill honing, and relationship building. It is a fulfilling way to transform what you have into what you need.
Bookmark Kits
To make the most of the kits (or assemble your own), please review the following instructions.
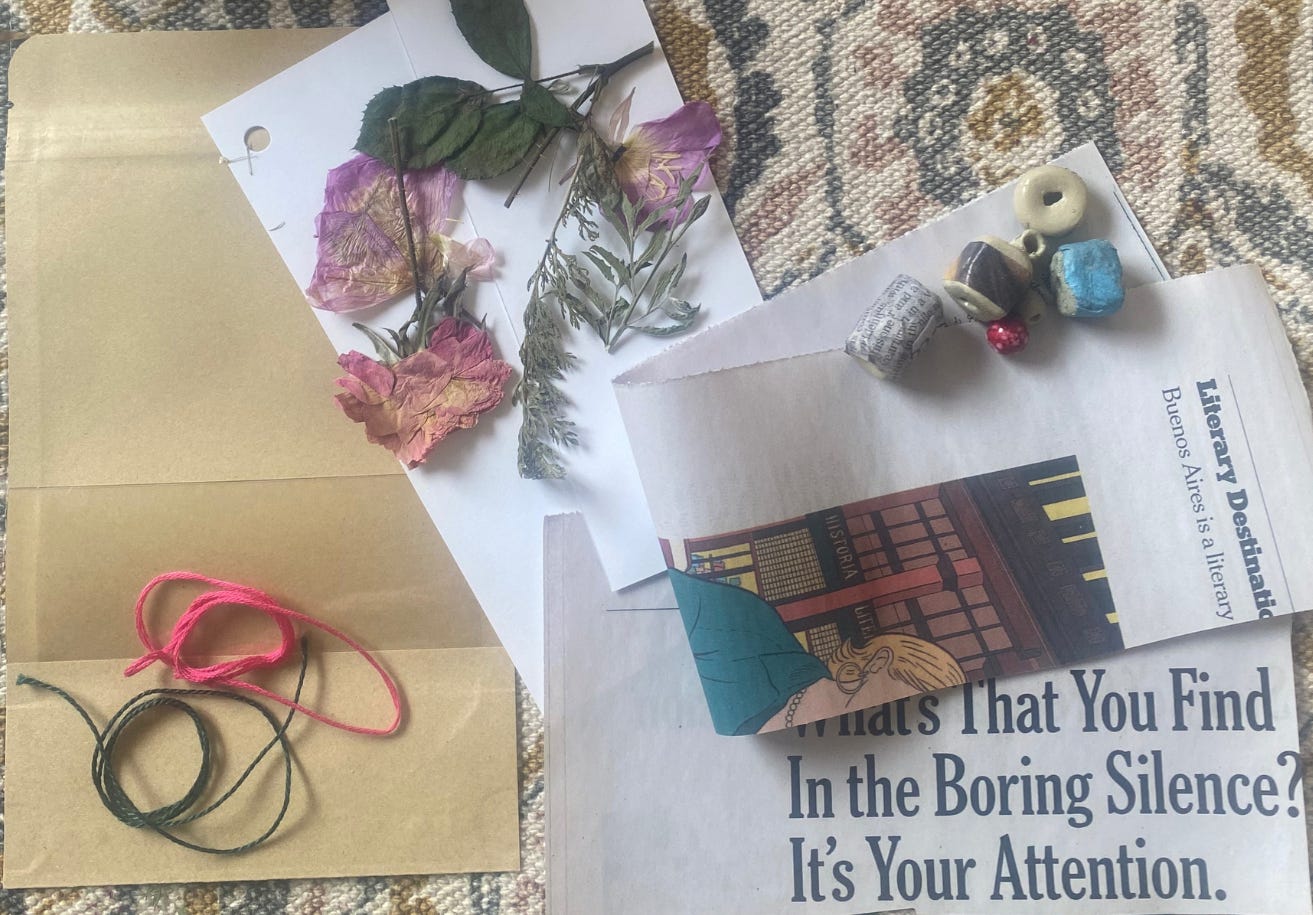
You will need:
Paper cutouts (with hole punched on top corner)
Pressed florals
Newspaper clippings
String
Beads
Adhesive/Sealer
Paintbrush
Paint (optional)
Markers (optional)
Tape (optional)
Needle (optional)
Step 1
Arrange decor. Lay newspaper clippings, pressed flowers, etc on bookmark paper to achieve desired design. Map out where you will add paint, or drawings.
Step 2
Lay the foundation. If you want your base to be paint now is the time to paint. If you want a newspaper background secure it first using an adhesive.
Step 3
Build your layers. Use adhesive to secure newspaper clipping, pressed florals, paper cutouts, anything you want to add. Do this in layers and allow sufficient time for each layer to dry before starting the next.
TIP: When testing the kits I found that a combination of a glue stick and mod podge worked best for my desired result. I also found that the fragility of the florals could be overcome by apply the adhesive to the paper and then tapping on them to secure them.
Step 4
Add finishing touches. Stickers, marker designs, gold leaf—be adventurous. Add those special details to make the design truly yours.
Step 5
Thread string through beads of your choice. Then loop through the hole punched in your paper cutout and secure. Add feathers, or braid string for extra flair.
TIP: If you are having trouble threading the string through the beads—try a needle or use tape to create a thin, rigid end. Think aglet.
That’s it! Now you have a beautiful handmade good that is uniquely your own. Be sure to let me know how it went for you, and if you picked up one of the free kits I supplied tag me on Instagram so I can see your amazing work.

Up Next:
The Worm Moon, March 14th. Make sure you subscribe for the next cycle of aligning ourselves with the natural world!